
Guide To The Crafting UI
A crafting system with the depth of Firefall's would simply not work on a simple interface. When in development there were many revisions to the system due to player feedback and one of the most requested features was the ability to really customize every feature of weapons and armor being made. For example players who want to be efficient with constraints could make a Plasma Cannon which has high direct hit damage but a small splash damage radius. If you had both of these features as high as possible the item would be significantly more costly on whatever battleframe it was equipped on, which may not be useful if the user happens to be a crackshot and doesn't really need that extra splash radius.
Therefore the crafting UI itself can appear very daunting for a new user, so this guide will help you to get familiar with what you see at the Molecular Printers.
MOLECULAR PRINTERS
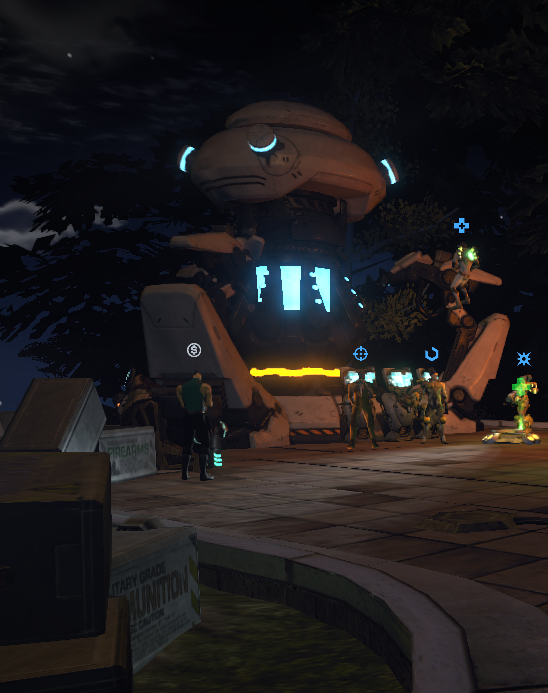
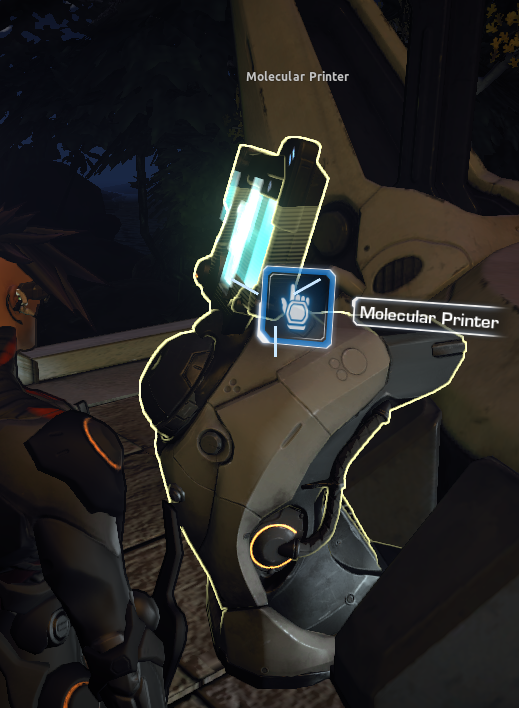
The printers themselves are often located within major towns or outposts, they are marked on the map and are usually easy to find as there are many players gathered around them. They are free to use and function as both the crafting workbench and collection point for your items. Each of them has several terminals located around their edge which can be interacted with to open the printer interface. In addition to making items they are also used to refine raw materials into their refined versions for use in crafting. Raw materials have no use until processed.
Unlike many MMOs crafting and refining does not happen instantly. The more complex the item and the larger the quantity, the longer it takes to process. Stage 1 weapons can typically take around 20 minutes for example. The process can be made instant by using redbeans which are the tokens you buy from Red5 for real money. As in many Free-2-Play games you pay for convenience and Firefall is no different. You do not need to wait around for the process to continue, in fact many players will leave items processing while they go and play or leave especially lengthy builds to run while they are offline.
NANOPRINTS
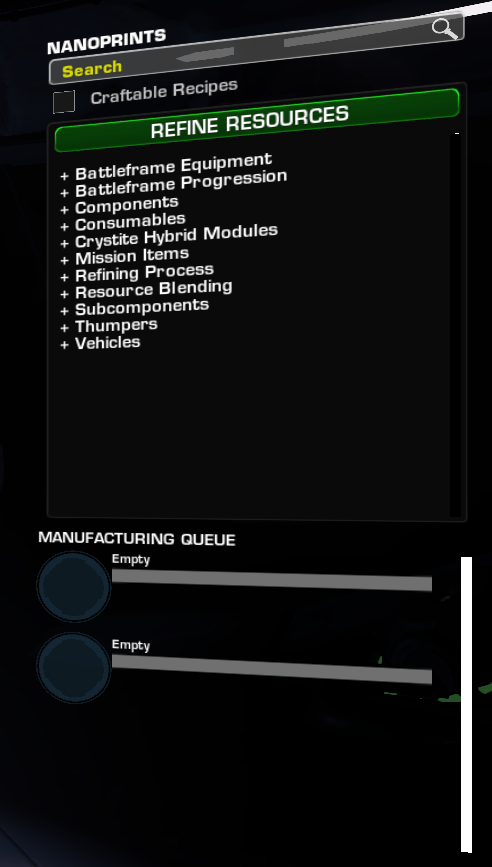
When you first open the interface the most important place to first look is to your right. Down this side of the screen you will see a section marked Nanoprints and below it will be the Manufacturing Queue. There is also a large button marked Refine Resources which allows quick access for refining raw materials. Nanoprints are essentially the Firefall word for recipes or blueprints.
What you initially see are not Nanoprints, rather than are categories or groupings for the recipes themselves. Here is a quick run-down of what these all are:
BATTLEFRAME EQUIPMENT
This is where you will find most of the items you craft for your battleframes. This category includes primary weapons, secondary weapons, armor plating, abilities and the common gear such as Servos for movement speed and Jumpjets. Everything is organized by the name of the battleframes or is classified as a Common Component or Secondary Weapon.
BATTLEFRAME PROGRESSION
Some of the constraint unlocks require special items to be in your inventory when you choose to purchase them. This is where you find their recipes.
COMPONENTS
This category is huge, it is all of the small bits which are put into the items you can craft. Most players have no need to go into here directly as the recipes they are working with allow them to automatically jump to any components they may need.
CONSUMABLES
Medikits, Extra Ammo, Sonic Detonators and other items which are single-use. Most of them can be manufactured in multiples at once.
CRYSTITE HYBRID MODULES
Crystite Modules are very costly components for other items. They often require you to process loot drops into a sub-component that goes into creating these modules. Fortunately you will also find the loot drop processing recipes under this category too!
MISSION ITEMS
Items. Used for missions. Because they are mission critical items. Useful.
REFINING PROCESS
Various refining recipes that also include the ability to turn raw materials into the in-game currency (Cy) at a 2/1 ratio. Handy for turning low grade ore into something especially useful.
RESOURCE BLENDING
Used for combining resources of the same type together. The main purpose is to clean up your small stacks of resources which are too tiny to craft anything. It combines them as an average of everything being tossed into the recipe.
SUBCOMPONENTS
Much like the components category. You won't be going directly into here much. It is the components for the components. Hence the name, sub-components.
THUMPERS
These are the various sizes and types of mining Thumper you will see being used. All of the recipes are kept in this category.
VEHICLES
Ground and air vehicle recipes. Nuff said.
THE NANOPRINT ITSELF
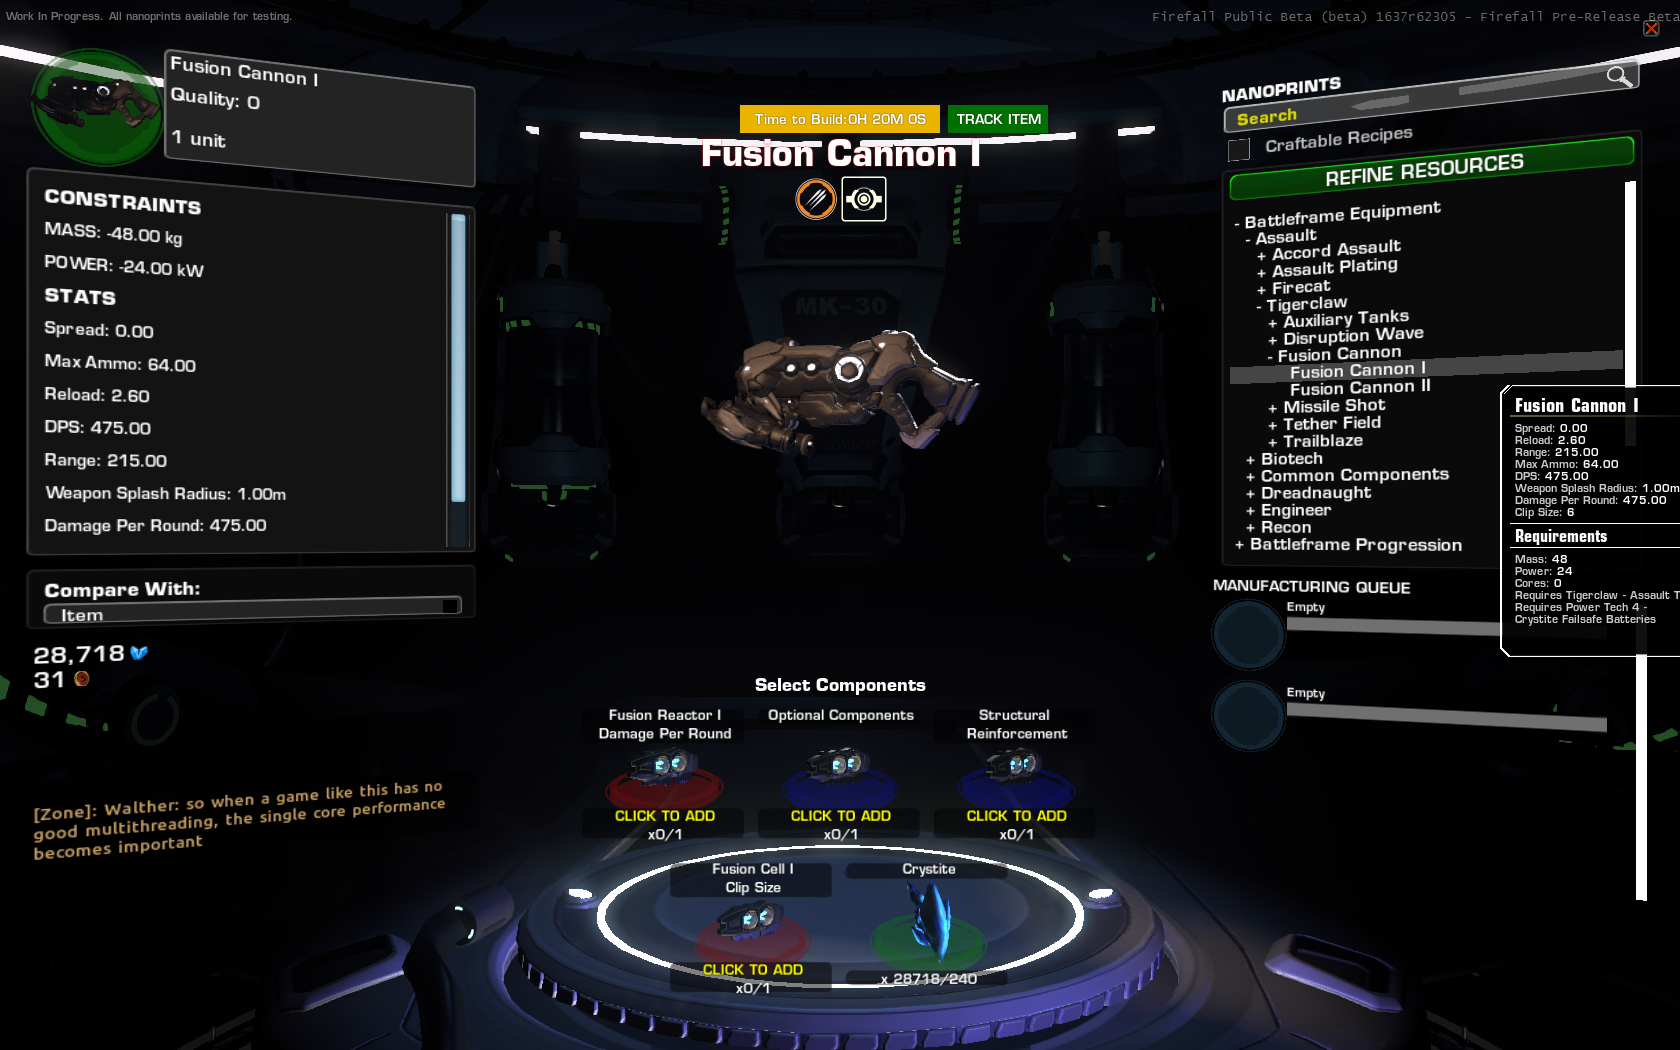
For this example we are going to start with a look at a typical weapon for a Firefall battleframe. In this instance it is the Tigerclaw's Fusion Cannon. You can find this under the Battleframe Equipment category through the Assault sub-category. It can be found here because the Tigerclaw is a variation of the Assault battleframe. A special thing to note here as well, you may notice that the Accord Assault has quite a large number of abilities listed compared to the varients. This is because the varients such as the Tigerclaw can also use Accord Assault gear. This can be very useful to know when building your ideal loadout.
Once you click on a Nanoprint recipe you will see lots more information appear. You will notice that there is quite a bit to take in. Along the middle bottom we have all the parts needed to create the Fusion Cannon, above it is the weapon itself and above that again is the requirements for using the weapon. Right at the top center is the time needed to craft the item as well so you can plan ahead and a button labelled Track Item. What this allows you to do is to add that item to your Mission Tasks bar on-screen, by holding down the Acquire Target key it will expand the menu out to show your progress for gathering the items needed for that nanoprint. To the left you have the stats and constraint costs for the item and the quality of the item. Since no parts have been added to the recipe it currently reads as zero quality.
Many final items will not need resources directly. What you will find is that they all have a minimum crystite cost and require components. This guide will not explain the crafting process in full, for that information please check the RAWR: Crafting Guide.
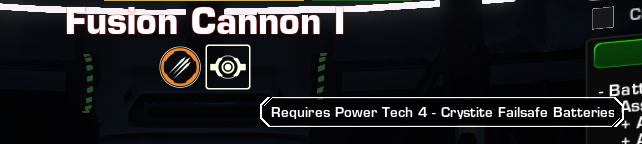
Now returning to the top center there are some icons below the name of the item you are making. These explain the minimum requirements for the item to be equipped on a battleframe. The icons will not appear for equipment such as a Thumper since those have no battleframe requirements. In this example the Fusion Cannon I requires the Tigerclaw Battleframe and Power Tech 4, which is the 4th Power slot you can unlock. If you now look at the next image, this is showing the Fusion Cannon II which is a more advanced model. This requires Power Tech 6 but as you can see there is a red padlock icon appearing which means that my Tigerclaw battleframe does not have that unlocked. This means although I can make the item, I cannot use it.

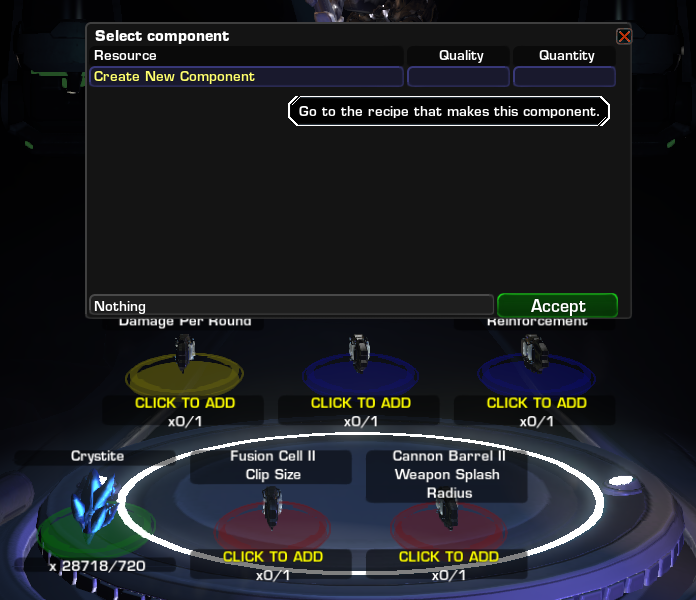
COMPONENTS REQUIRED
Although we cannot use Fusion Cannon II it will provide as an excellent example for the UI. As you can see here it requires three components, each one governing a different feature of the Cannon. One is the Damage per round, another is Clip size and finally you have Splash Radius. But we are only going to look at the Fusion Ractor II which will define the Damage per round.
If you click on the part within the recipe it will open a small window. This will display what you have in your inventory already since we do not have any of these you would click on the button at the top which says Create New Component. The interface will then change and jump straight to the recipe for this component.
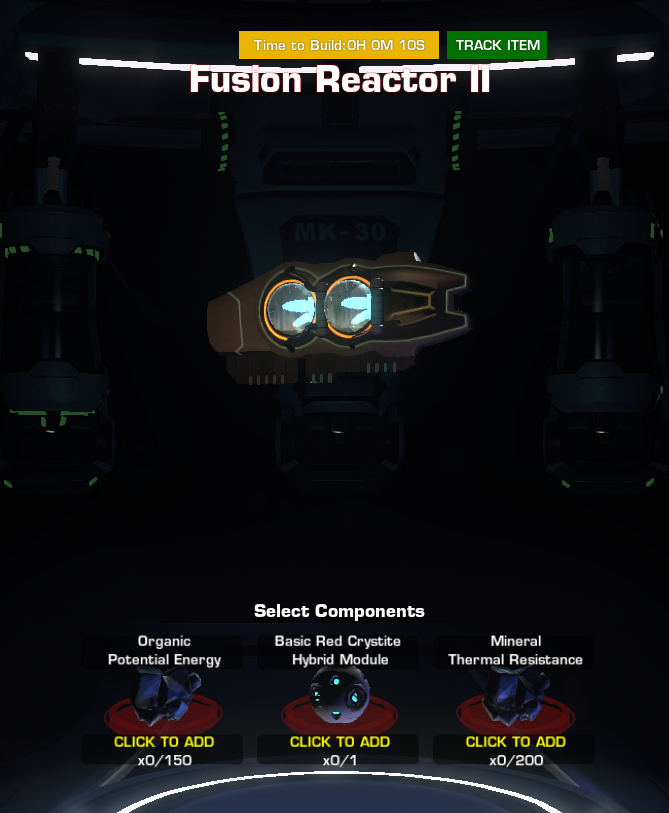
The Fusion Reactor II requires a sub-component and two types of refined resource. The first is an Organic and the second is a Mineral. Under the names of the materials require is some text which explains which stat on those materials will be used for determining the quality of this component. The Organic will use Potentail Energy and the Mineral will use Thermal Resistance. To begin let us start with the sub-component - the Crystite Module.
As before when you click on the part it will open a new window within the crafting interface. This time we have plenty of sub-components available to choose from. They are arranged by order of quality from highest to lowest and colour coded. The three columns show the name of the item, the quality as a value and the quantity of that item you have in the last column. To use any of the items listed you click on it and the name appears at the bottom of the window, you then press the Accept button to place it into the crafting recipe.
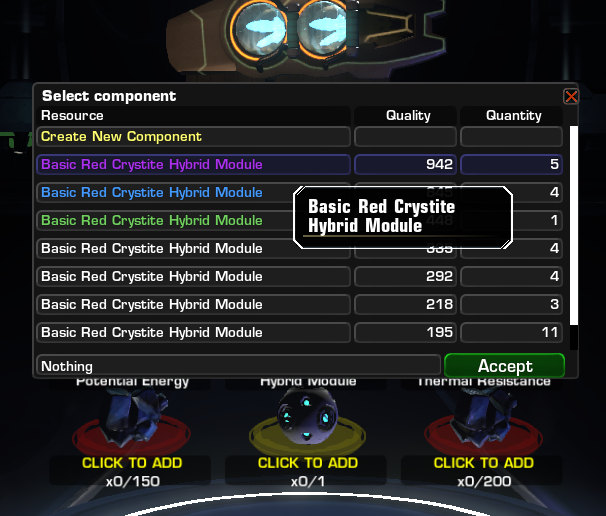
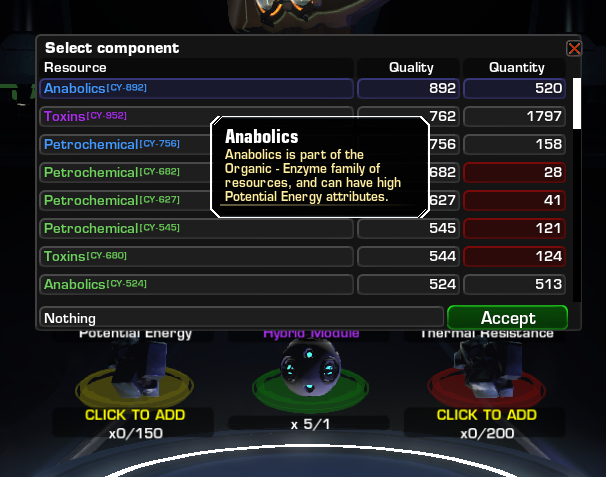
If you repeat the process with the resources you get a similar window appear however resources have more than 1 stat. Therefore the quality of the resource will differ from the value of the stat being used. This may seem confusing as a blue-grade resource could appear above a purple-grade resource within the ordered window. This is because the stat in use for the recipe is higher on the blue-grade resource compared to the purple. As recipes will often need more than 1 unit of a resource you will notice that the final column on the window may have some materials marked in red. this is because you do not have enough of that material for the recipe.
As you add parts to the recipe the information to the left of the screen will change. Of particular interest will be the Quality rating in the top left corner. You can read more about how Quality is determined in the RAWR: Crafting guide.
A SIMPLE BIT OF MANUFACTURING
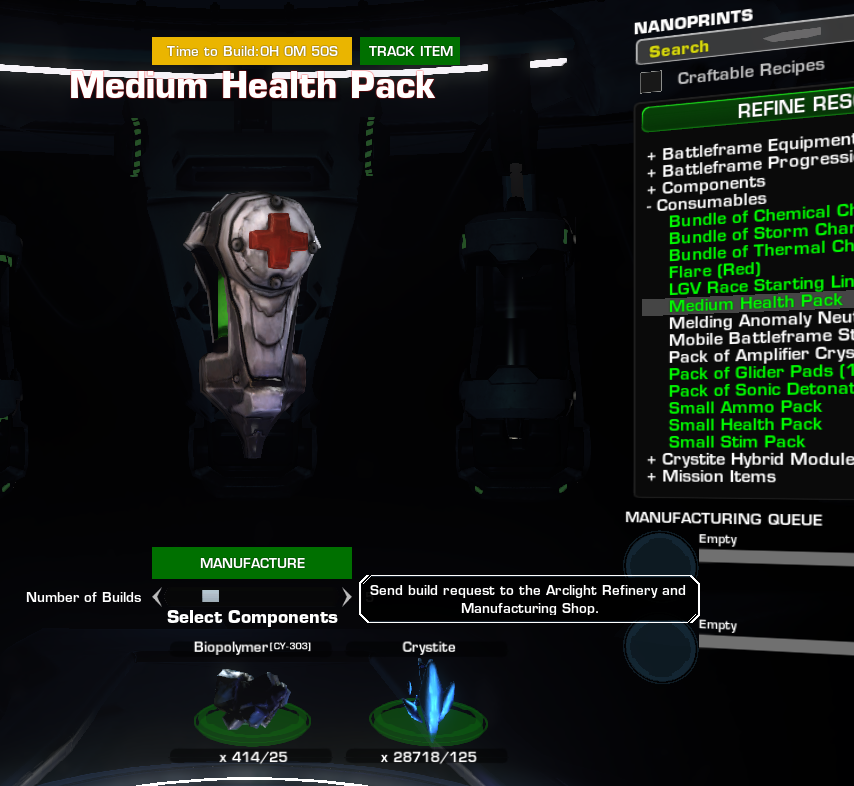
For the last step in creating an item let's look at something very simple. A medium health pack which can be found under the Consumables category. Compared to making weapons the consumables are far more simple, the medipack for example requires just a refined organic material and some crystite.
One additional part of the UI to take special note off is the Number of Builds slider which appears. This is especially useful for consumables as you normally need more than 1 of them. Here we have selected a total of 5 medipacks which normally require 10 seconds each, at the top of the screen however you will notice it says 50 seconds. This is because the build times are combined for each individual item.
Once all of the parts of the recipe are entered you simply press the Manufacture button. The manufacturing job is then added to the Queue in the bottom right corner. A process bar will appear along with the time until completion. Under these is a large button which says Finish Now. This is the way to instantly finish the manufacturing process in exchange for redbeans. Do not worry about accidently pressing this button however since a pop up window will always appear to confirm the decision to use redbeans. Just to the right edge of the progress bar is a red cross, this is used to cancel the manufacturing job. Again a pop up window will ask you to confirm.
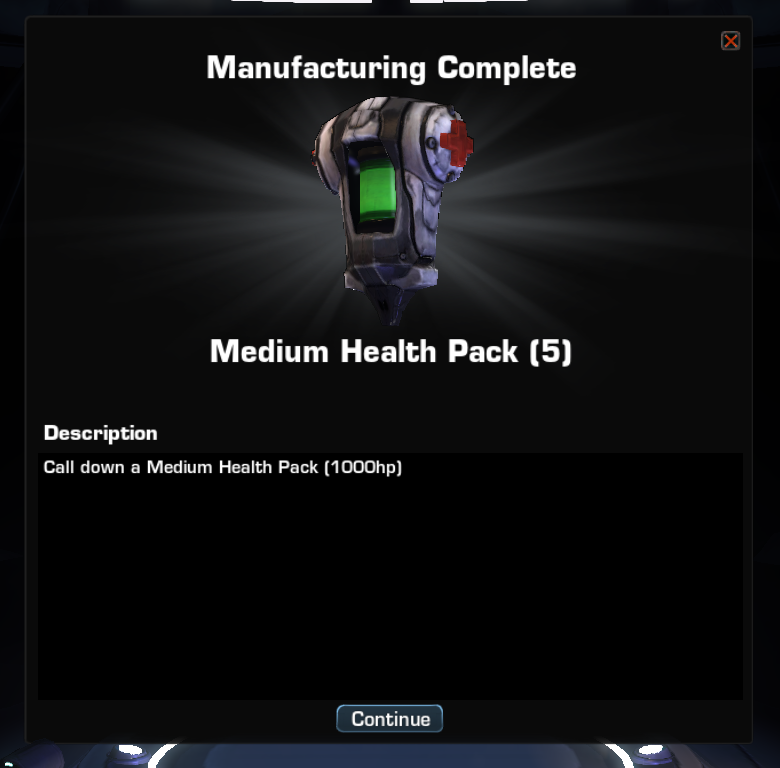
When the process is finished the bar will turn green and the button will now say Claim items. Once you press this the following menu appears which will give you information about what you just created or in the case of refining it will give you details for what you refined and any bonus materials that were extracted in the process.
PLEASE NOTE THAT THIS GUIDE IS IN THE PROCESS OF BEING REWRITTEN AS THE UI HAS CHANGED