
Tactical Thumper Placement
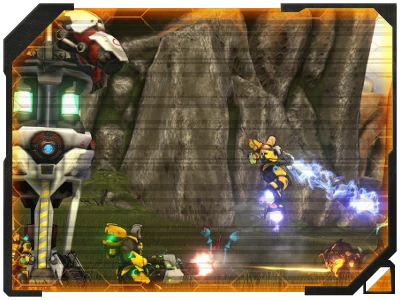
While seemingly simple in concept, the fact is that thumping is a more tactical challenge than it may initially seem. Even if you ignore the need for finding the epicenter of a resource node there is still much to consider about the placement and defending of the thumper while it is drilling.
TACTICAL PLACEMENT
One of the worst tactical choices you can make with Thumpers is to allow enemies clear line of sight and access to the thumper from all angles. The more directions they came approach from and the more angles they can fire attacks from the harder it will be to quickly notice them and make it significantly more difficult to quickly clear attack waves. Under perfect conditions enemies should only be able to approach and attack the thumper from one single direction and are forced into a narrow chokepoint so they become vulnerable to concentrated firepower. This applies to both soloing and when in a squad, however a squad will clearly be better suited to handling a location which can be assaulted from all directions at once.
A large portion of what will defines the best placement for the thumper will be the kinds of enemies you will face and how they usually attack. When facing threats with ranged abilities it is very important to try and get obstacles to block direct line of sight to the thumper. This will cause the enemies to move to specific locations in order to get a clear line of sight or to attempt move closer and go around the obstacle. In both cases this buys time for the thumper as the enemies are moving into position and because multiple ranged enemies will usually find the same area to fire from they become more vulnerable to Area of Effect attacks. Melee-based enemies are also especially vulnerable to choke-points.
Threats which prefer melee attacks are best handled by forcing them to go around terrain or by placing the thumper need to steep hills or cliff-edges which cannot be scaled. While this will not slow down Aranha, who are able to walk up walls, it will cause Threshers and Terrorclaws to take a detour to approach the Thumper and therefore buys more time for the thumper to reach capacity.
THREAT SPECIFIC PLACEMENT ADVICE
Depending upon where the thumper is mining you will trigger waves of enemies specific to that region, this will help you to decide what is the best placement for the thumper as well.
ARANHA / FOREST
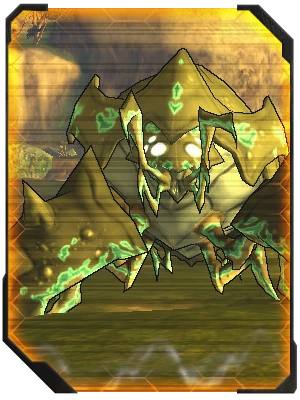
The 'bugs' are typically found in forested areas of the world and further inland away from the beaches and ocean. They are largely melee-based enemies although they do appear alongside Wasps and some Aranha will have a ranged-acid attack. Threshers also join swarms of Aranha and pose a significant threat due to their powerful melee attack. Another one of the biggest threats are the Exploding Aranha which can take huge chunks out of your thumper if they are allowed to get close to them. Given that the majority of the Aranha are melee-only and the significant risk posed by the 'sploders it is better to try and crate choke points to funnel them into tight groups.
PRIORITY TARGETS FOR ARANHA / FOREST WAVES
1. Exploder
2. Thresher
3. Wasp
4. Everything else
One of the biggest mistakes players make when facing Aranha is due to the ability they have to walk on walls. Against many enemies it is a good idea to place the thumper at the foot of a cliff or on top of a raised area with a sheer drop next to it because it makes that direction unapproachable. However with the ability to walk on walls the Aranha are handed a significant tactical advantage when players do this.
Placing at the foot of a cliff isn't too bad but does change the amount of awareness needed.
Under normal circumstances a player only needs to look around themselves and out to the horizon. Basically they only need to be aware of enemies in a 2D environment. As soon as you add that cliff into the equation against Aranha you are now going to be aware of what is approaching from above as well. In addition to this the indicators on the mini-map will not be as useful since you cannot clearly judge how far a wave is from the thumper or how many there is based purely upon the number if red icons since they are displaying from a top-down view. Further to this any weapons or abilities which are influenced by gravity are now going to be harder to use. For example, the Plasma Cannon and Bioneedler will require the user to aim higher because of the change to the trajectory when firing upwards. Items which need to be placed on the ground, such as Mortars can no longer be used against Aranha approaching along a vertical surface.
If the thumper is right next to a steep drop then players will find it especially hard to even see Aranha approaching from below unless they are standing right on the edge themselves or across the gap looking down onto the cliff-face. This can allow the bugs to only be noticed once they have already reached the thumper.
HISSERS / THESHERS
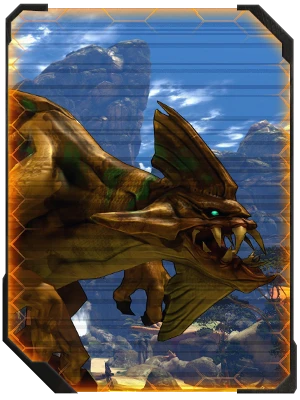
When in the desert and savannah areas of the world such as Cerrando Plains you will find you are attacked by waves of Threshers and Hissers when the thumper starts drilling. With the exception of the Spitting Threshers all of these creatures are melee-only however the Reckless Threshers move so fast that it hardly matters. Hissers can also burrow back into the ground and reappear under your feet or right next to the thumper which can mean that building a defensive perimeter is less effective.
Fortunately none of these animals are capable of walking on walls like the Aranha so finding a cliff-edge is very effective. Due to their lack of ranged attacks they are especially vulnerable to bottlenecks, however the Reckless Threshers can often pass through so quickly that they do not take much damage. Hissers who approach a bottleneck and start to take damage will also begin to burrow underground to protect themselves so any fire-power focussed on this area needs to be intense. Anything which adds physical barriers or can knock creatures around will be a huge asset against these kinds of waves.
PRIORITY TARGETS FOR HISSER/THRESHER WAVES
1. Reckless Thesher
2. Vicious Thresher
3. Spitting Thresher
4. Everything else
Although it may seem that the Vicious Threshers are you biggest problem the fact is that it is the Reckless ones that need to be prioritized. While they do not appear to be causing much damage as individuals they can really become an issue when charging in packs, especially if they start to juggle you. They will typically ignore the Thumper and choose to focus on players, this is that leads players to underestimate how much of a danger they pose
COASTAL WILDLIFE
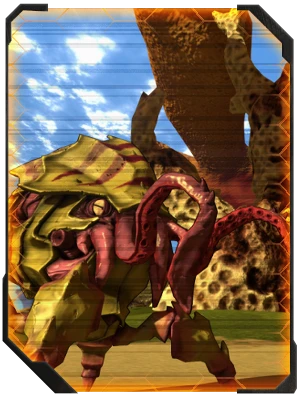
It is not really possible to classify this group as any specific pairing of creatures or a single species. It is a mixture of insects, ocean creatures and burrowing animals and can only be triggered when thumping in the North-Eastern region of New Eden and along the coast. Many players agree that this type of wave is possibly one of the hardest types other than Chosen waves, largely down to the mixture of creatures and their different abilities. Fortunately none of the animals are capable of walking on walls like the Aranha.
It isn't that every creature is especially troublesome, but there are two which really cause problems when they appear at the same time. These are the Nautilus and the Brinewyrm. The Nautilus has some of the most annoying and dangerous abilities out of any of the creatures in Firefall. Aside from their ability to withdraw within their shell to become invulnerable when they run low on health they can also hold players in place for several seconds and posses an Ink Spray ability which can be used at close range like some kind of biological flamethrower. It does lots of damage so players need to avoid standing within the spray for any length of time - which is easier said than done when another Nautilus has immobilized you
PRIORITY TARGETS FOR COASTAL WILDLIFE
1. Nautilus
2. Brinewyrm
3. Culex
4. Everything else
The Brinewyrms aren't quite as bad but pack a punch which cannot be underestimated. While they are not as aggressive as other creatures they are very accurate and sneaky. Because they can burrow into the ground and prefer to stay at a distance they can be sniping the Thumper from long range and players don't even notice them because of the swarms of animals nearby that appear to be a greater threat. Because the Brinewyrms prefer to avoid combat they will burrow back into the ground at a moments notice so they need to be finished off quickly.
The choice of thumper placement is really going to depend on your strengths and weaknesses. Both of these creatures cannot be ignored but you can rarely find a spot which has both a bottleneck and plenty of obstacles to break line of sight for ranged attacks. There are some perfect spots like this which exist along the coast so consider yourself blessed if there happens to be a good resource epicentre located in those areas.
Everything else is fairly straight forwards. Culex are like Wasps and Skivers are like basic Aranha. Something to watch for however is that all of these creatures can spawn and attack from underwater so keep your eyes on the sea-floor as well!
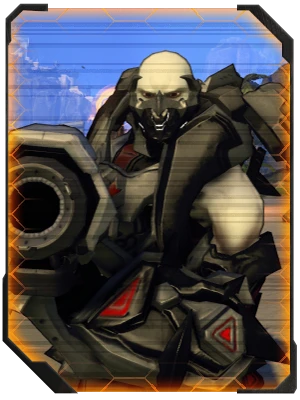
CHOSEN
Fortunately the only time you will trigger Chosen waves is when thumping within region that repulsors recently pushed the Melding away from or when thumping right next to the Melding event horizon. Meld-thumping is very dangerous but it can also yield significant rewards as viens within and near to the Melding are typically of a higher quality and higher concentration than elsewhere in the world. But without some solid defence the rewards may not justify the risks.
That said though, despite being very tough to fight Chosen it is actually easier to decide what is best to do with the Thumper. The Chosen are 90% ranged so focus on getting lots of ways to break line-of-sight with the Thumper. A bottleneck is handy however only 3 enemies are melee-based threats and all of them are very easy to kill quickly so even a supportive battleframe can handle them alone.
PRIORITY TARGETS FOR CHOSEN WAVES
1. Juggernaut
2. Melded Exploder
3. Sniper
4. Everything else
Unfortunately low cover won't be enough because Juggernauts will use their Mortars to hit the Thumper by angling their shots in a steep trajectory to fire them over obstacles. This naturally means Juggernauts need to be a high priority target.
There isn't really any singular tactic to protecting the thumper from Chosen. They have so many types of units and creatures at their disposal that something is going to be getting through. Be it the Melded Hissers popping up right next to the Thumper or those small band of Snipers sitting in some distant shadows causing problems you cannot do anything but hold a defensive line together. Going on the offence isn't really an option, so a solid defence will really be best. Prioritize high threat targets and take them down fast!
HOW TO HANDLE BOSS WAVES
What has been dubbed 'boss waves' occur at around 70%-80% capacity and are normally the 10th wave to spawn. With the exception of the Chosen all other wave types will have Terrorclaws and Giant Culex as their boss waves. Whenever a boss wave starts it is always best to hit them with attacks and lead them away from the thumper.
If you try to fight them around the thumper their size can cause it to be hard to see other threatening mobs which are nearby. This tactic is also necessary for dealing with Siegebreakers and Terrorclaws as they have Cone attacks which can damage the Thumper even then the boss was aiming at a player. It is for this reason that you should never stand between a boss and the thumper or near to the thumper! Always direct their attacks outwards and away from it. When you are facing a mixture of Terrorclaws and Giant Culex always deal with the Terrorclaws first since they are much more dangerous and harder to cause harm too. The only exception to this is if you notice the Giant Culex focussing entirely on the thumper. When this happens cause some damage to it so that it switches its attention to you but then continue to work on the Terrorclaw(s).